Flashing TWRP on Samsung devices | By Varun Banka
Flashing TWRP on Samsung devices | By Varun Banka
Flashing TWRP (Team Win Recovery Project) on a Samsung device using Odin is a fairly simple process that can be done by anyone with basic technical knowledge. TWRP is an open-source custom recovery that provides users with a wide range of features and functionalities, including rooting, backing up, and installing custom ROMs. In this guide, we’ll walk you through the process of flashing TWRP on a Samsung device using Odin.
Before we start, here’s what you’ll need:
- A Windows computer
- A Samsung device that supports TWRP
- A USB cable to connect your device to the computer
- The latest version of Odin (you can download it from the official Samsung website)
- The TWRP recovery image for your device
Step 1: Bootloader Unlocking
Before you can flash TWRP on your Samsung device, you need to enable USB debugging and OEM unlocking. Here’s how to do it:
Step 2: Install the Samsung USB Drivers
Before you connect your Samsung device to the computer, make sure that you have the latest Samsung USB drivers installed on your computer. You can download the drivers from the official Samsung website.
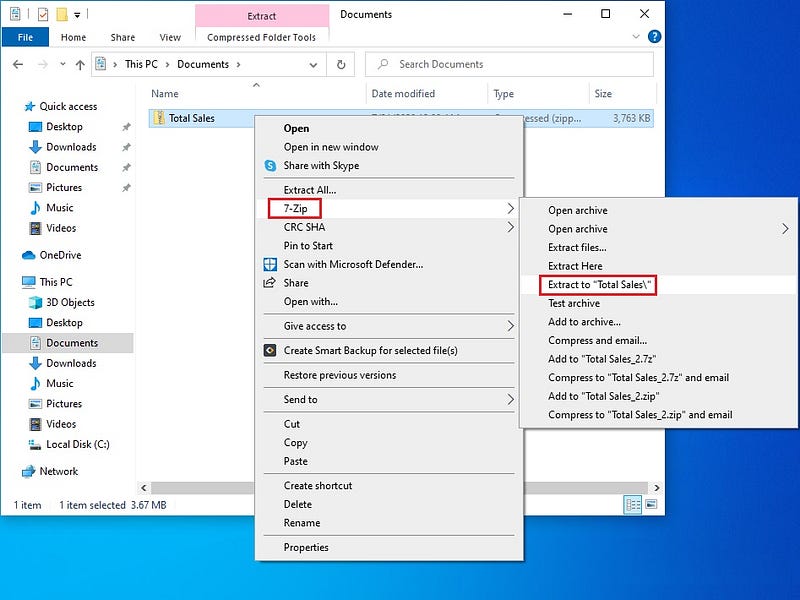
Step 3: Extract the Odin File
Once you have the Odin file downloaded, extract it to your computer. You can extract the file using WinRAR or 7zip or any other archive manager software.

Step 4: Boot Your Samsung Device into Download Mode
To flash TWRP using Odin, you need to boot your Samsung device into download mode. Here’s how to do it:
- Turn off your device
- Press and hold the Volume Down, Home, and Power buttons at the same time
- When the Samsung logo appears, release the Power button and keep holding the Volume Down and Home buttons
- You should now see a warning screen, press the Volume Up button to enter download mode

Step 5: Connect Your Device to the Computer
Once your device is in download mode, connect it to the computer using a USB cable.
Step 6: Launch Odin
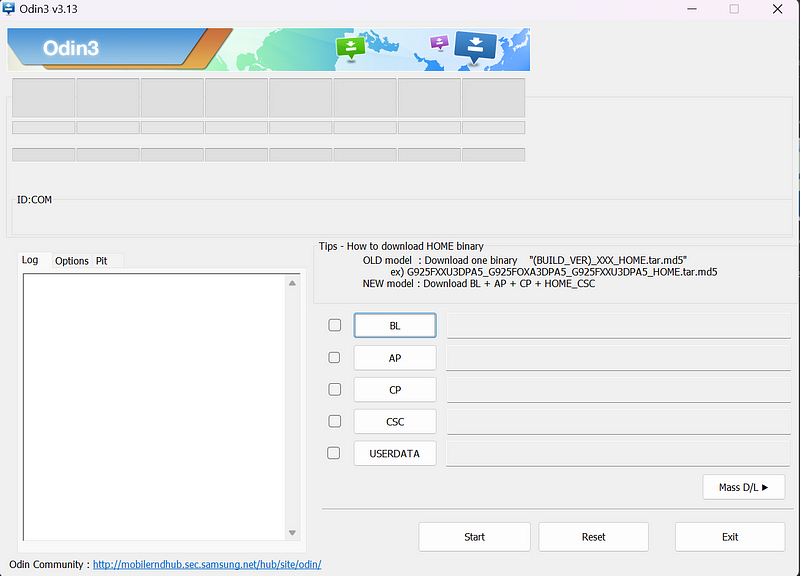
Open the Odin file that you extracted in Step 3 and launch the application.

Step 7: Load the TWRP Recovery Image
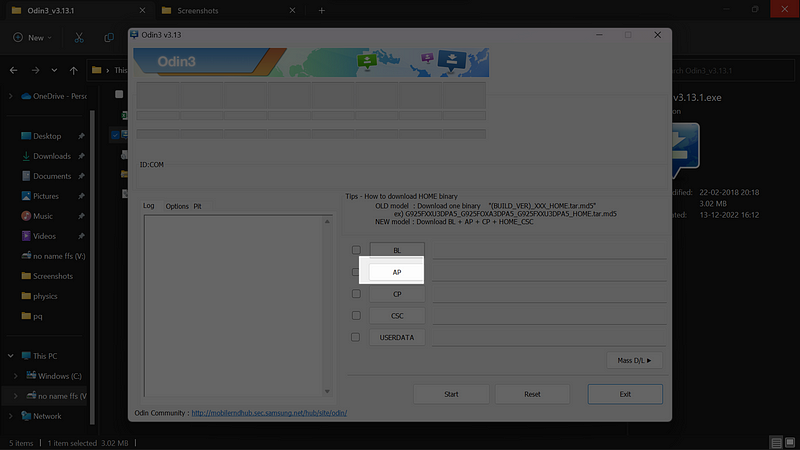
In Odin, click on the “AP” button and select the TWRP recovery image for your device.

Step 8: Start the Flashing Process
Once you have loaded the TWRP recovery image, click on the “Start” button to start the flashing process.
Step 9: Wait for the Flashing Process to Complete
The flashing process may take several minutes to complete, so be patient. Once the process is complete, your device will automatically restart.
Step 10: Boot into TWRP
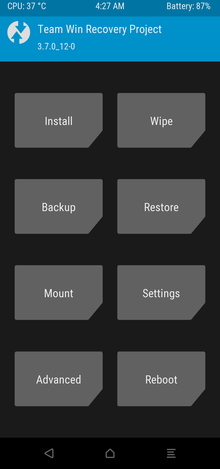
To boot into TWRP, turn off your device and then press and hold the Volume Up, Home, and Power buttons at the same time. Keep holding the buttons until the TWRP splash screen appears.

Congratulations, you have successfully flashed TWRP on your Samsung device using Odin. From here, you can now root your device, install custom ROMs, and enjoy the full benefits of TWRP.
In conclusion, flashing TWRP on a Samsung device using Odin is a simple process that allows users to take advantage of the many features and functionalities offered by TWRP. However, it’s important to note that flashing TWRP or any custom recovery may cause unintended consequences, such as boot loops. If you find yourself facing a boot loop, the best course of action is to flash the stock ROM to restore your device to its original state. Keep in mind that the author of this guide is not responsible for any damage that may occur during the flashing process. If you need further help, you can reach out to the author by dropping an email at bankavarun18@gmail.com.